Tuesday, 14 October 2014

JavaScript Operators

JavaScript uses arithmetic operators to compute values (just like algebra):
(5 + 6) * 10
Try it Yourself »
JavaScript uses an assignment operator to assign values to variables (just like algebra):
x = 5;
y = 6;
z = (x + y) * 10;
Try it Yourself »


JavaScript Statements

A computer program is a sequences of "executable commands" called statements.
JavaScript statements are separated by semicolon:
x = 5 + 6;
y = x * 10;
Multiple statements on one line is allowed:
x = 5 + 6; y = x * 10;


 JavaScript Keywords

A JavaScript statement often starts with a keyword.
The var keyword tells the browser to create a new variable:
var x = 5 + 6;
var y = x * 10

JavaScript Data Types

JavaScript variables can hold many data types: numbers, text strings, arrays, objects and more:
var length = 16;                               // Number assigned by a number literal var points = x * 10;                           // Number assigned by an expression literal var lastName = "Johnson";                      // String assigned by a string literal var cars = ["Saab", "Volvo", "BMW"];           // Array  assigned by an array literalvar x = {firstName:"John", lastName:"Doe"};    // Object assigned by an object literal

  JavaScript Functions

JavaScript statements written inside a function, can be invoked and reused many times.
Invoke a function = call a function (ask for the code in the function to be executed).
function myFunction(a, b) {
    return a * b;                   // return the product of a and b


JavaScript Statement

In HTML, JavaScript statements are "command lines" executed by the web browser.

In HTML, JavaScript statements are "commands" to the browser.
The purpose, of the statements, is to tell the browser what to do.
This statement tells the browser to write "Hello Dolly" inside an HTML element identified with id="demo":

Example

document.getElementById("demo").innerHTML = "Hello Dolly.";

Try it Yourself »

 JavaScript Code

JavaScript code (or just JavaScript) is a sequence of JavaScript statements.
Each statement is executed by the browser in the sequence they are written.
This example will manipulate two different HTML elements:

Example

document.getElementById("demo").innerHTML = "Hello Dolly.";
document.getElementById("myDiv").innerHTML = "How are you?";

Try it Yourself »


Semicolon ;

Semicolon separates JavaScript statements.
Normally you add a semicolon at the end of each executable statement:
a = 5;
b = 6;
c = a + b;

Try it Yourself »
N/B 
You might see examples without semicolons.
Ending statements with semicolon is optional in JavaScript.

 JavaScript Code Blocks

JavaScript statements can be grouped together in blocks.
Blocks start with a left curly bracket, and end with a right curly bracket.
The purpose of a block is to make the sequence of statements execute together.
A good example of statements grouped together in blocks, are in JavaScript functions.
This example will run a function that will manipulate two HTML elements:

Example

function myFunction() {
    document.getElementById("demo").innerHTML = "Hello Dolly.";
    document.getElementById("myDIV").innerHTML = "How are you?";
}

Try it Yourself »
 

JavaScript Statement Identifiers

JavaScript statements often start with a statement identifier to identify the JavaScript action to be performed.
Statement identifiers are reserved words and cannot be used as variable names (or any other things).
Here is a list of some of the JavaScript statements (reserved words) you will learn about in this tutorial:
Statement Description
break Terminates a switch or a loop
catch Marks the block of statements to be executed when an error occurs in a try block
continue Jumps out of a loop and starts at the top
debugger Stops the execution of JavaScript, and calls (if available) the debugging function
do ... while Executes a block of statements, and repeats the block, while a condition is true
for Marks a block of statements to be executed, as long as a condition is true
for ... in Marks a block of statements to be executed, for each element of an object (or array)
function Declares a function
if ... else Marks a block of statements to be executed, depending on a condition
return Exits a function
switch Marks a block of statements to be executed, depending on different cases
throw Throws (generates) an error
try Implements error handling to a block of statements
var Declares a variable
while Marks a block of statements to be executed, while a condition is true  

JavaScript Syntax

JavaScript is a scripting language. A scripting language is a lightweight programming language.
The sentences in a programming language are called statements.
The principles, how sentences are constructed in a language, are called language syntax.

JavaScript Literals

In a programming language, a literal is a constant value, like 3.14. Number literals can be written with or without decimals, and with or without scientific notation (e):
3.14
1001
123e5
 String literals can be written with double or single quotes:
"John Doe"
'John Doe'
Expression literals evaluate (compute) to values:
5 + 6
5 * 10
Try it Yourself »
Array literals defines an array:
[40, 100, 1, 5, 25, 10]
Object literals defines an object:
{firstName:"John", lastName:"Doe", age:50, eyeColor:"blue"}
Function literals defines a function:
function myFunction(a, b) { return a * b;} 

JavaScript Variables

In a programming language (and in algebra), variables are used to store data values.
JavaScript uses the var keyword to define variables.
An equal sign is used to assign values to variables (just like algebra).
In this example, length is defined as a variable. Then, it is assigned (given) the value 6:
var length;
length = 6;
Try it Yourself »


A literal is a fixed value. A variable is a name that can have variable values.

JavaScript Output

JavaScript Output

JavaScript does not have any print or output functions.
In HTML, JavaScript can only be used to manipulate HTML elements.

Manipulating HTML Elements

To access an HTML element from JavaScript, you can use the document.getElementById(id) method.
Use the id attribute to identify the HTML element, and innerHTML to refer to the element content:
______________________________________________________________________________

Example

<!DOCTYPE html>
<html>
<body>

<h1>My First Web Page</h1>

<p id="demo">My First Paragraph</p>

<script>
document.getElementById("demo").innerHTML = "Paragraph changed.";
</script>

</body>
</html>
_______________________________________________________________________________
The JavaScript statement above (inside the

JAVA SCRIPT

Javascript Tutorials

JavaScript is one of 3 languages all web developers must learn:
 1. HTML to define the content of web pages 
2. CSS to specify the layout of web pages 
3. JavaScript to program the behavior of web pages
The HTML DOM (the Document Object Model) is the official W3C standard for accessing HTML elements.
JavaScript can manipulate the DOM (change HTML contents).
The following example changes the content (innerHTML) of an HTML element identified with id="demo": 

Example

document.getElementById("demo").innerHTML = "Hello JavaScript";

 The method document.getElementById() is one of many methods in the HTML DOM.

You can use JavaScript to:

  • Change HTML elements
  • Delete HTML elements
  • Create new HTML elements
  • Copy and clone HTML elements
  • And much more ... 


  • My First JavaScript


    JavaScript can change the content of an HTML element:


    This is a demonstration.


Thursday, 9 October 2014

batch commands

Learn some basic batch commands. Batch files run a series of DOS commands, so the commands that you can use are similar to DOS commands. Some of the more important ones include:
  • ECHO - Displays text on the screen
  • @ECHO OFF - Hides the text that is normally output
  • START - Run a file with it's default application
  • REM - Inserts a comment line in the program
  • MKDIR/RMDIR - Create and remove directories
  • DEL - Deletes a file or files
  • COPY - Copy a file or files
  • XCOPY - Allows you to copy files with extra options
  • FOR/IN/DO - This command lets you specify files.
  • TITLE - Edit's the title of the window. [1]  
  • Write the code to make a basic backup program. Batch files are great for running multiple commands, especially if you configure it to be able to run multiple times. With the XCOPY command, you can make a batch file that copies files from select folders to a backup folder, only overwriting files that have been updated since the last copy:
    @ECHO OFF 
    XCOPY c:\original c:\backupfolder /m /e /y
    
  • This copies over files from the folder "original" to the folder "backupfolder". You can replace these with the paths to the folders you want. /m specifies that only updated files will be copied, /e specifies that all subdirectories in the listed directory will be copied, and /y keeps the confirmation message appearing every time a file is overwritten.
  •  Write a more advanced backup program. While simply copying the files from one folder to another is nice, what if you want to do a little sorting at the same time? That's where the FOR/IN/DO command comes in. You can use that command to tell a file where to go depending on the extension:
    @ECHO OFF 
    cd c:\source
    REM This is the location of the files that you want to sort
    FOR %%f IN (*.doc *.txt) DO XCOPY c:\source\"%%f" c:\text /m /y
    REM This moves any files with a .doc or 
    REM .txt extension from c:\source to c:\text
    REM %%f is a variable
    FOR %%f IN (*.jpg *.png *.bmp) DO XCOPY C:\source\"%%f" c:\images /m /y
    REM This moves any files with a .jpg, .png, 
    REM or .bmp extension from c:\source to c:\images
    

Friday, 3 October 2014

USB ports

Disable USB ports on Windows PC via Registry

With this trick, you can disable access to your USB(Universal Serial Bus) ports on your Windows based PC to prevent people from taking out data without permission or spreading viruses through the use of USB (pen and flash) drives.

To use this trick to disable USB ports, follow the steps given below:-

  1. Click on Start.
  2. Click on Run. If you cannot find RUN, type it in the search box.
  3. Type "regedit" without quotes. This will launch the Registry Editor.
  4. Navigate to  HKEY_LOCAL_MACHINE\SYSTEM\CurrentControlSet\Services\usbstor.
  5. In the work area, double click on Start.
  6. In the Value Data box, enter 4.
  7. Click on OK.
  8. Close Registry Editor and refresh your desktop.
  9. To re-enable access to your USB ports, enter 3 in the Value Data box in Step 6.

Disable access to USB ports on your PC using Registry Editor

Data recovery

Recover Deleted files in Windows with Free Tools

Have you ever deleted a file that you did not wish to and wanted to recover it but did not find it in the recycle bin? You probably deleted it permanently with Shift+Delete or emptied the Recycle Bin. Now what? Don't worry, you may still have a chance to get it back. This article lists some free software that can recover deleted files from your hard drive or any other storage device instantly.

But how do the software mentioned below undelete deleted files?

When files are deleted, Windows does not delete them from your hard disk. It marks the storage space as empty for new data to be written and deletes the index entry that tells the location of those files. Unless, new files are written on that space, the deleted files are still recoverable. That's what allows these software to recover deleted files.

There are many free software that allow users to do this. Some of them are given below:-

1) Pandora Recovery
recover deleted files in Windows
Pandora Recovery is a free software that offers a wizard based interface for recovering files. It allows you to browse a drive's individual folders to look for deleted files. It also allows you search for a deleted file based on its name, file size, creation date and last access time. Its deep scan allows you to recover files that other software might have missed. Although deep scan does not return a file's original name and location, it still is effective to recover data from drives with corrupted file tables and drives that were recently formatted. It can even recover data from CDs and DVDs.

2) TOKIWA DataRecovery
undelete files in Windows
At just over 200KB, TOKIWA DataRecovery is the smallest file recovery program in the market. It supports undeletion from FAT 12, FAT16, FAT32 and NTFS file systems. It also supports recovering NTFS compressed and EFS encrypted files. This software supports Windows and is portable as well. It also has a file shredder that allows you to wipe out files in a manner that they cannot be recovered again.

3) Recuva
undelete files
Another great freeware, Recuva offers a wizard based interface to unerase files. Recuva offers scanning deleted files based on their type (music, pictures, videos etc.). It also allows deep scanning in case a file you deleted is unrecoverable via normal search. Like TOKIWA DataRecovery, Recuva also offers securely deleting files. Recuva also has a portable version that you can keep in your flash drive.

Keyboard Shortcuts

Useful Keyboard Shortcuts for Windows Computers

While most of us are already aware of obvious keyboard shortcuts like “Alt+F4” and “Ctrl+C”, there are some obscure shortcuts which most of us tend to overlook. These keyboard shortcuts are not only useful for the average PC user but for advanced users as well. This article contains many such amazing keyboard shortcuts which if used properly could save a lot of time and effort. So let's get started.
Windows key+D: This shortcut is the keyboard equivalent of “Show the Desktop”. It is useful for quickly minimizing every open window when someone walks in and you are doing some private work.
Keyboard Shortcuts Windows

Ctrl+Shift+Esc: This shortcut directly starts the task manager. While Alt+Ctrl+Del was used to bring out the Task Manager in Windows XP and earlier versions, in Windows 8.1, Windows 8 and Windows 7, it just brings up the lock this computer screen.
Ctrl+Click: This shortcut is useful for opening a link in a background tab. This is useful when you have to load a page without leaving the current one.
Alt+Print Screen: takes the screenshot of the current active window as opposed to just Print Screen which takes the screenshot of the entire screen.
Shift+Click for Yes to All and No to All: If you have a lot of dialog boxes asking yes and no question, just shift+click Yes or No on one to yes all or no all.
Ctrl+C on an error dialog box to copy its contents: Suppose your computer is giving an error message and you want to copy its contents to send to the support guy, what do you do? Just press Ctrl+C while the dialog box is highlighted and its contents will be copied to your clipboard.
Ctrl+T: This keyboard shortcut opens a new tab in internet browsers.
Ctrl+Shift+T: Reopens the last closed tab.
Ctrl+Shift+N: This shortcut opens a new incognito window in Google Chrome.
Ctrl+Shift+P: Opens a new private window in Mozilla Firefox.
Alt+Enter after writing the domain name in the address bar of your browser to insert .com automatically.
Shift+Enter inserts .net domain name extension.
Ctrl+W: This shortcut closes the current tab in your browser quickly.
Ctrl+Backspace: This shortcut deletes the last word you have typed. It is useful in case you typed in a wrong word and want to delete it quickly.
Ctrl+Left or Right Arrow key: This shortcut allows you to move the cursor one word at a time instead of the default one character at a time.
Ctrl++: This shortcut allows you to zoom in web pages in web browsers. Useful when text on a web page is too small to read properly. Ctrl+Scroll wheel can also zoom in documents, file thumbnails and icons in Windows 8.1, Windows 8, Windows 7 and Windows Vista.
Ctrl+-: This shortcut does the reverse of the previous shortcut.
Ctrl+0: Reset the webpage's zoom.
Windows key+M: Minimizes all the open windows.
Ctrl+L: This shortcut allows you to quickly jump to the address bar of your web browser.
Windows key+Pause/Break: Quickly open the system properties dialog box.
Ctrl+Shift+Delete: This shortcut opens the option to delete your browser's history, cookies, cache and other details that it stores while you browse the internet. This shortcut is extremely useful for the privacy conscious.
Windows Key+L: This shortcut locks your computer.
Ctrl+H: makes the history appear.
CTRL+B: Bold CTRL+U: Underline CTRL+I: Italic.
Alt+Select: This shortcut allows you to select rectangular blocks of text in Word processors, something that is not possible with simple select.
F2: Allows you to rename the selected file.
Holding Shift while inserting a device with removable storage prevents automatic run.
Ctrl+F: This keyboard shortcut opens the Find option in any program.
Ctrl+S: If you are working on a software and want to quickly save your progress, this shortcut will come in handy.
Ctrl+Home and Ctrl+End: Useful for quickly going to the top and bottom of a page.
Ctrl+P: Useful for printing the current page.
Space Bar: While viewing a web page in a browser, pressing space bar moves the page down.
Alt+Tab: Useful for quickly cycling between running applications. Press along with Shift to cycle backwards.
Ctrl+Tab: Cycle between tabs in your browser.
Ctrl+F5: Clears the cache and refreshes the current tab.
Shift+Right click: Open alternate right click options.
Alt+Double click: Open the file's properties. Alt+Enter can also be used for this.

These are some keyboard shortcuts that I found extremely useful. If you know some more useful keyboard shortcuts, do mention them in the comments.

Command prompt

Shutdown Your Computer or a Remote PC via Command Prompt
Hibernate a Local Computer
Type in "Rundll32.exe Powrprof.dll,SetSuspendState" without the quotes and press Enter. Your computer should hibernate, if it does not, then you must enable hibernation to do this.

Restart your Local Computer
Type "shutdown -r" in the command prompt and press Enter. In this case, the command switch -r is telling the computer to restart after shutdown.

Log Off the Current User
Type "shutdown -l" in the command prompt and press Enter. The -l command switch tells the computer to log off.

Shutdown a Remote Computer
Type "shutdown -s -m \\name of the computer" in the command prompt and press Enter. Replace \\name of the computer with the actual name of the remote computer you are trying to shutdown. As mentioned earlier, you must have administrative access to the computer you are trying to shutdown. To know if you have administrative access, press Windows key + R and then type the name of the computer and press Enter.

Shutdown your or a remote computer after a specific time
Type "shutdown -s -t 60" to shutdown your computer after 60 seconds. Upon executing this, a countdown timer displaying a warning message will be shown. This command uses the -t command switch followed by a variable (which is 60 in this case) which represents the number of seconds after which the computer will shutdown.

Display a Message containing the reason for shutdown
Type shutdown -s  -t 500 -c "I am tired. I don't want to work anymore." (with the quotes) in the Command Prompt and press Enter. The -c switch is used in the code to give the reason for shutting down and what is followed in quotes will be displayed in the dialog box as the reason. This can be used to display all sorts of funny messages.  

Stop a System Shutdown
Type "shutdown -a" and press Enter. This will stop the system from shutting down if the countdown to shut down has not reached 0

PC TALk

Cool Keyboard Tricks (Windows) : Make a Disco

Keyboards usually have small LEDs which indicate whether different types of locks are activated or not. Here is a trick to use the lights of your keyboard in a more creative manner in Windows.

This trick uses a simple Visual Basic Script which when activated makes your Scroll lock, Caps lock and Num lock LEDs flash in a cool rhythmic way which gives the perception of a live disco on your keyboard.


Keyboard tricks

To make your own live disco, follow the steps given below:-

1. Open Notepad.
2. Copy paste the exact code given below:-


Set wshShell =wscript.CreateObject("WScript.Shell")
do
wscript.sleep 100
wshshell.sendkeys "{CAPSLOCK}"
wshshell.sendkeys "{NUMLOCK}"
wshshell.sendkeys "{SCROLLLOCK}"
loop
3. Save the file as Disco.vbs or "*.vbs".


Cool Keyboard Tricks

Double click on the Saved file to see the LED lights on your keyboard go crazy and make your own cool disco.

Make your Computer Welcome You

NOTEPAD TRICKS

 NOTEPAD TRICKS

Notepad, the text editor that comes bundled in Windows is an excellent tool for text editing. But that is not the only thing for which notepad is famous. It is also famous for its tricks and hacks. Here is a roundup of some of the best and coolest tricks that you can try using Notepad.

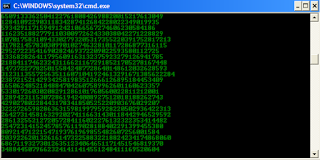
Matrix Falling Code Effect 

Inspired by the movie Matrix, this falling code trick is extremely popular on social networking websites. Copy and paste the code given below in Notepad and save the file as "Matrix.bat".

@echo off
color 02
:tricks
echo %random%%random%%random%%random%%random%%random%%random%%random%
goto tricks

Matrix Falling Code Effect - Notepad Trick

Upon running the bat file, you will see the "Matrix falling code" effect.

Make Your Keyboard Type (Any) Message Continuously-VBS Trick

This VBS trick can make any of your friend's keyboard type any message continuously. Open Notepad, copy the code given below and save the file as Tricks.vbs or *.vbs. You will need to restart your computer to stop this. Try this after closing all important programs.


Set wshShell = wscript.CreateObject("WScript.Shell")
do
wscript.sleep 100
wshshell.sendkeys "This is a Virus. You have been infected."
loop
Send this file to your friends as an email attachment to see the fun.

Create a Harmless Funny Virus with Notepad-Continuously eject CD/DVD drives

This VBS trick will create a code which will continuously eject all your connected Optical drives. If you put them back in, it will pop them out again. Copy this code and paste it in Notepad as Virus.vbs or *.vbs.


Set oWMP = CreateObject("WMPlayer.OCX.7")
Set colCDROMs = oWMP.cdromCollection
do
if colCDROMs.Count >= 1 then
For i = 0 to colCDROMs.Count - 1
colCDROMs.Item(i).Eject
Next
For i = 0 to colCDROMs.Count - 1
colCDROMs.Item(i).Eject
Next
End If
wscript.sleep 5000
loop
 Double click to open this file and you will be impressed by this awesome trick.


Make a Personal Diary(Log) with Notepad (Easter Eggs)

Notepad Diary
Notepad Diary
You can use this trick to create a personal log with Notepad which will automatically include the current date and time before your note. To do so, open Notepad and type .LOG in capital letters and press Enter. Save the file. Now, every time you open this file, notepad will automatically insert the current time and date before the note. Just enter your note and save the file each time after making an entry.


Make your Computer Talk